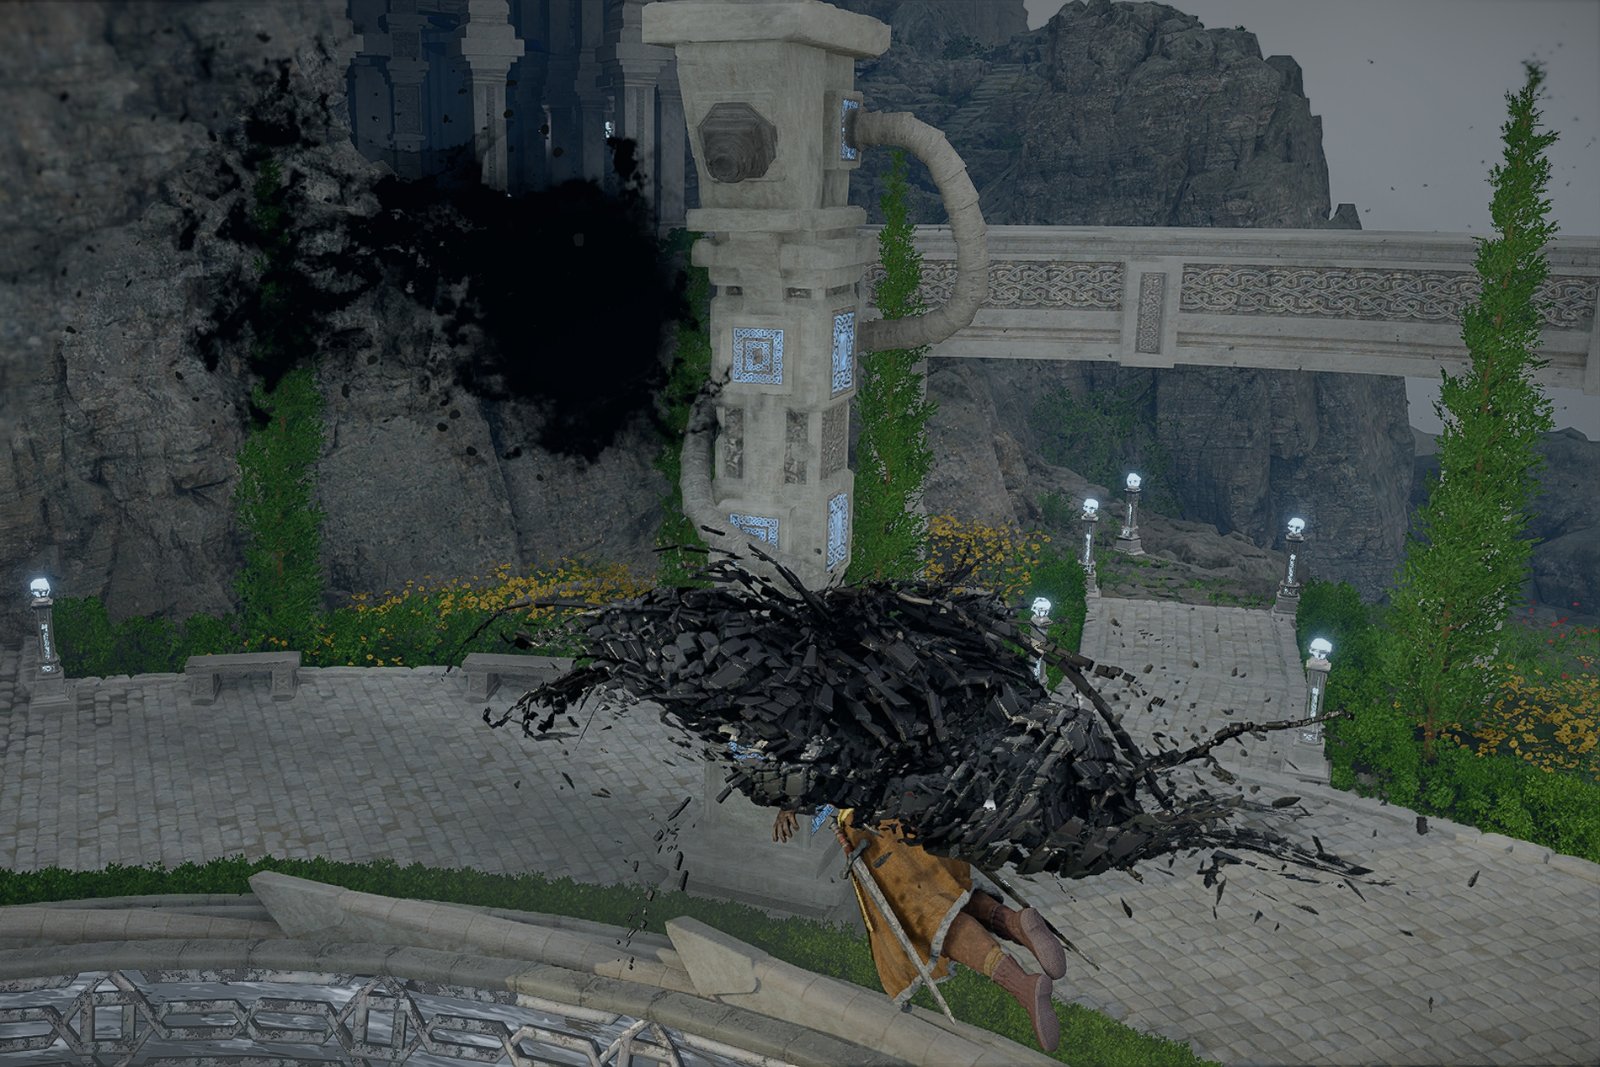
How do you even beat Tenebrum in Crimson Desert? This is one of the more confusing bosses you’ll have faced so far, because what you are up against is not a physical enemy but an out-of-control, void-born cloud that moves erratically through the air and lashes out with persistent black tendrils.
Against my better judgment, I spent a good portion of the fight trying to figure out what Blinding Flash had to do, so I was told to do by the game before the fight even began. Don’t listen to what it tells you, because the Tenebrum boss fight is surprisingly easy, as it comes down to patience and landing three well-timed hits with a certain move.
Table of Contents
Tenebrum Attack Patterns
The boss does not have a particularly intricate moveset, but here are some of its notable abilities to keep in mind:
- The boss flies above the experiment dome and follows an irregular path.
- It repeatedly shoots black tendrils that deal damage if they hit you.
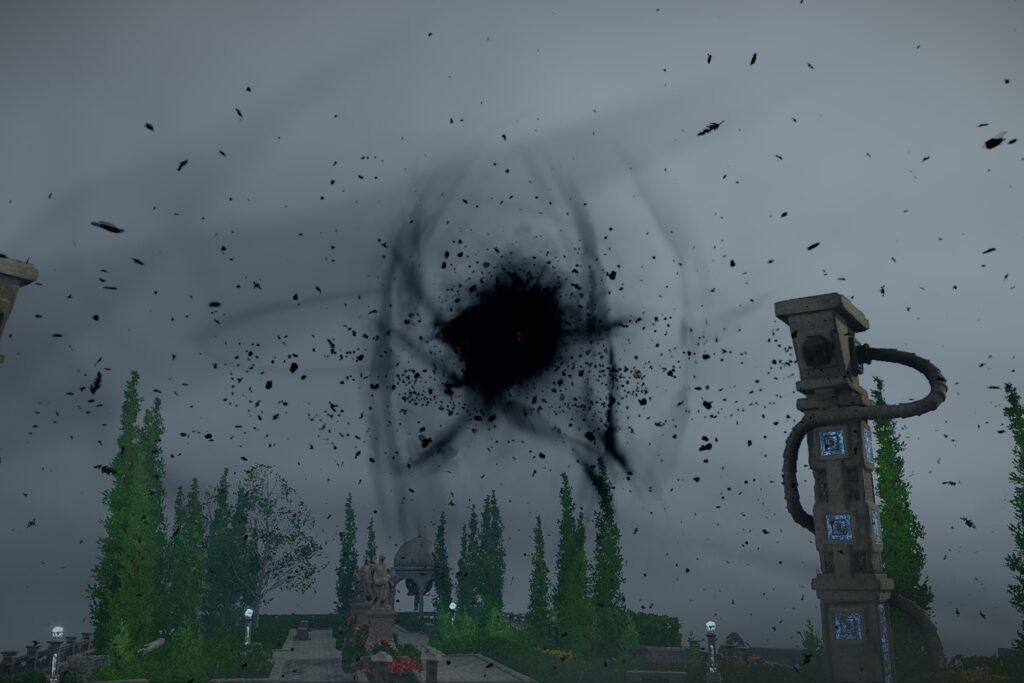
- It also moves to the center every so often after its usual attacks and charges up an AoE shockwave that sends multiple tendrils at once.
How to Beat Tenebrum in Crimson Desert
The Tenebrum boss fight initiates immediately after you forcibly remove the unstable core during the Gate to the Otherworld main quest in Chapter 4. Here’s how to beat it.
Tenebrum Boss Preparations
Not much can be said in the way of preparation against Tenebrum, because you cannot target it with physical hits, nor can you pelt it with arrows from a distance. Your only reliable means of damaging it is with Force Palm. However, I do recommend coming in prepared with the following:
- Armor gear with a high defence rating, though I highly recommend the Frostcursed Armor set for this particular fight.
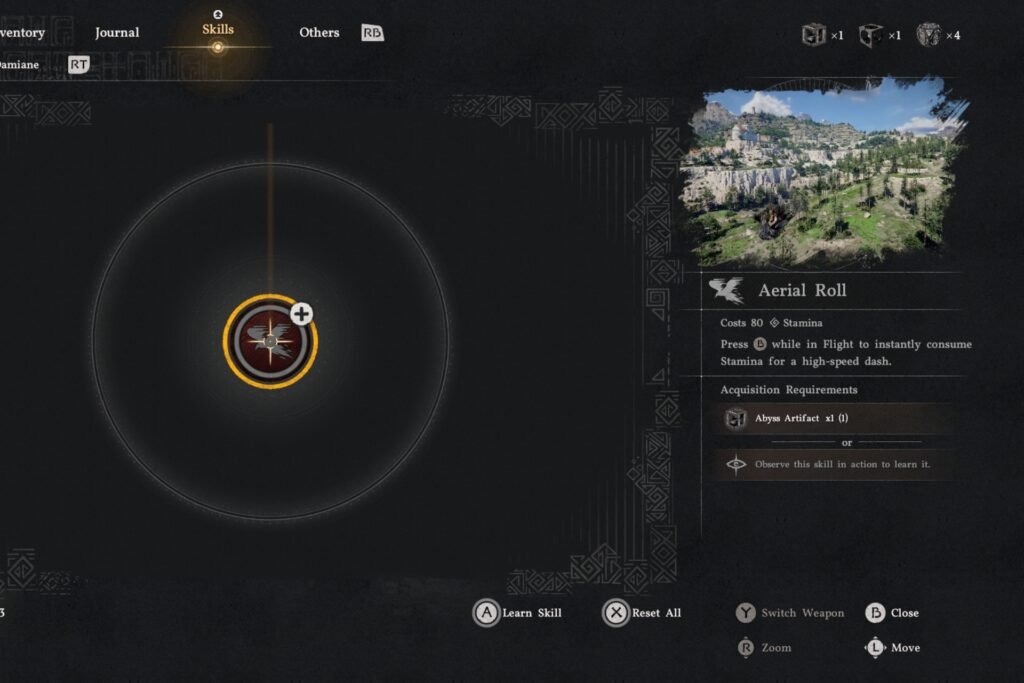
- Unlocking Aerial Roll is also highly recommended because you will need to be in the air yourself for this fight.
- This skill allows you to dodge mid-air. While you can unlock it naturally without spending an Abyss Artefact, that happens later in the story, so it is perfectly fine to spend one beforehand for Tenebrum.
- This one is fairly self-explanatory, but bring some food to restore health when you are running low on HP.
Tenebrum Boss Easy Strategy
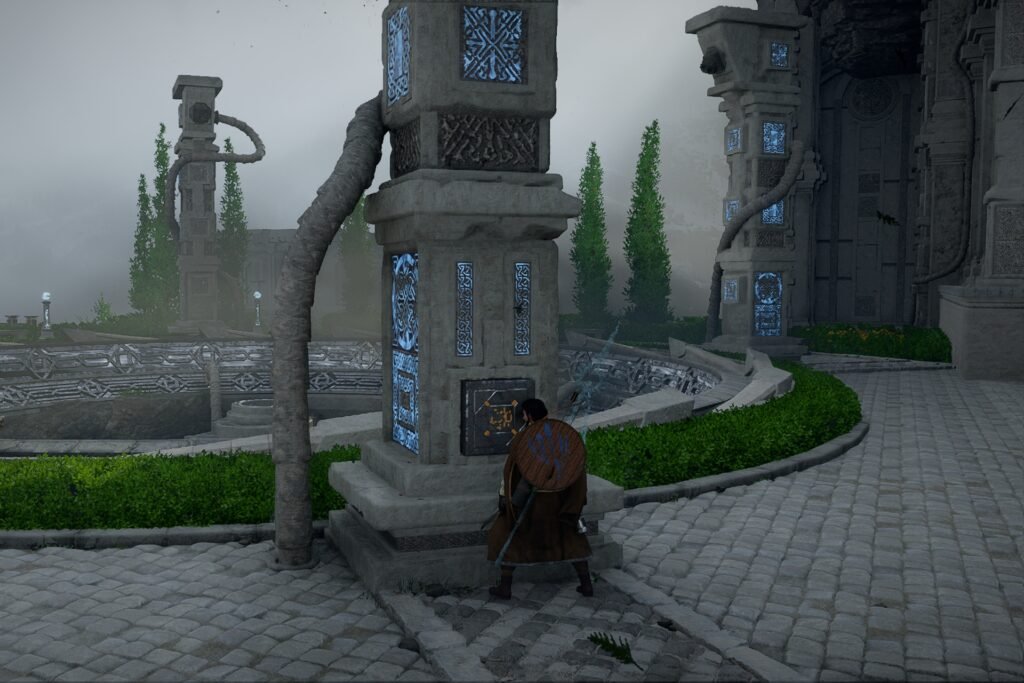
As soon as the boss fight starts, use Blinding Flash only once, as prompted at the start of the encounter. This simply marks Tenebrum, but once you do so, you should immediately make use of one of the pillars surrounding the experiment dome, as they act as a shelter against Tenebrum’s relentless barrage of attacks.
Wait for it to stop its erratic movement, and it’ll move to the center of the boss arena to charge up its AoE attack. You must seize this moment and glide toward it using the air current from the dome before it unleashes the attack. Locking on with the D-Pad down helps you stay on target, and once you are close enough, immediately use Force Palm with R3.
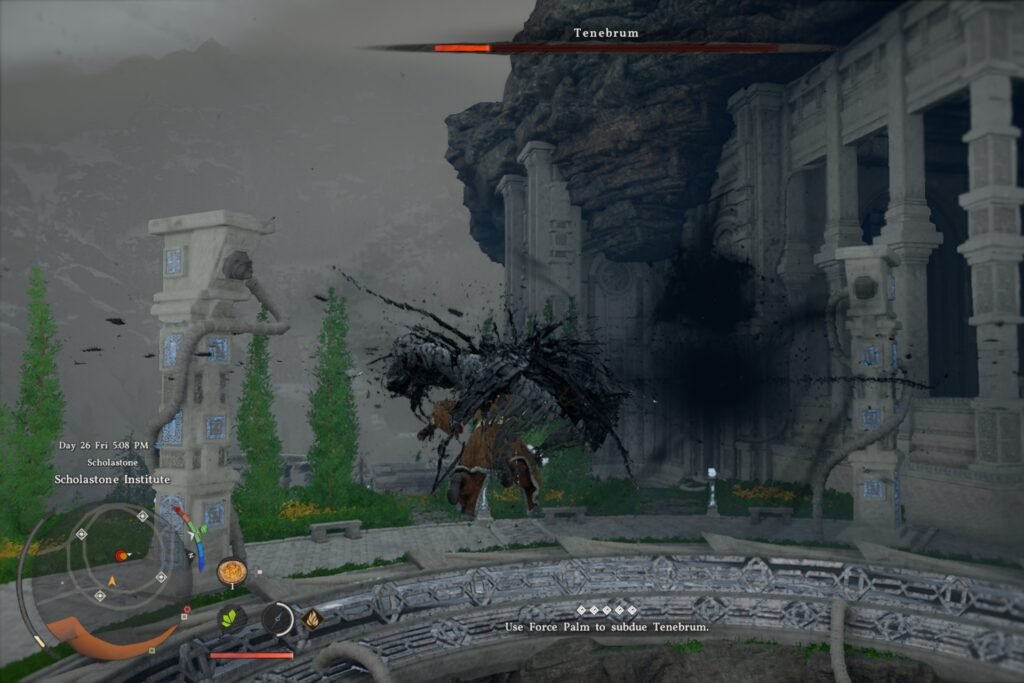
This will damage Tenebrum and remove one-third of its health bar. Then retreat to the safety of a pillar right after and repeat this process two more times. That is all it takes to end the fight and send Tenebrum packing back to the void.
While an Abyss Artifact is all you get for defeating Tenebrum, you also gain access to the Spire of the Stars to press onward toward the climax of Chapter 4.