Genshin Impact is known for making endgame content tailored towards newer characters. This time, however, it seems players have a bit more flexibility in the Spiral Abyss.
This is largely due to Varka teams having a lot of damage contribution from Pyro supports. So if you have some decently built characters, you are on the right track.
Still, to help you strategize in all the chambers, we have made this Spiral Abyss guide so you can make the best teams with the right synergies.
Table of Contents
Floor 11
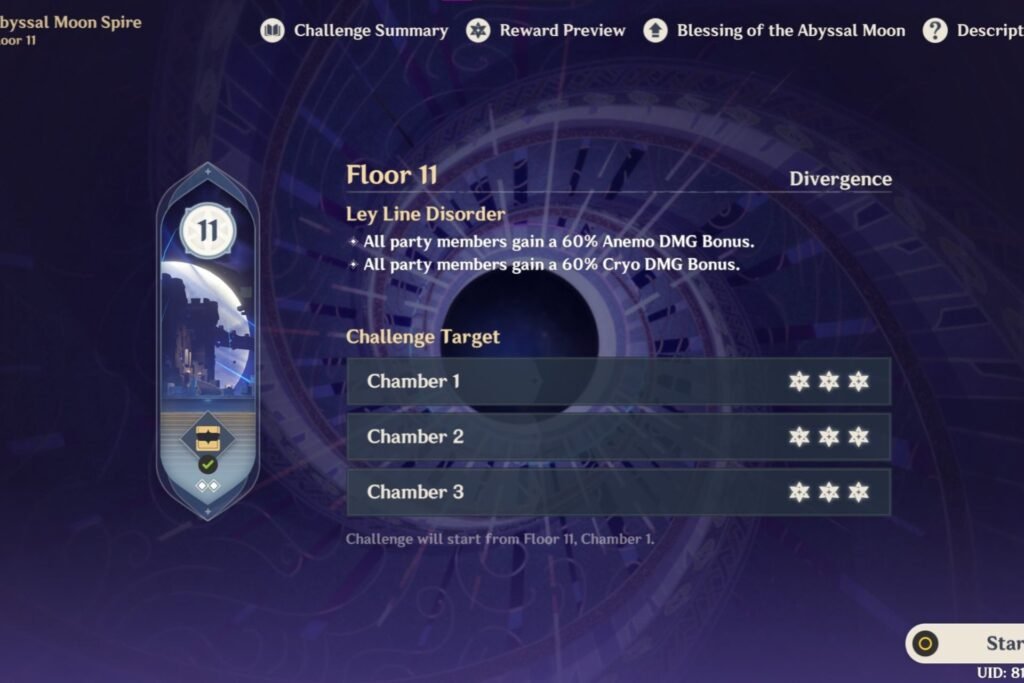
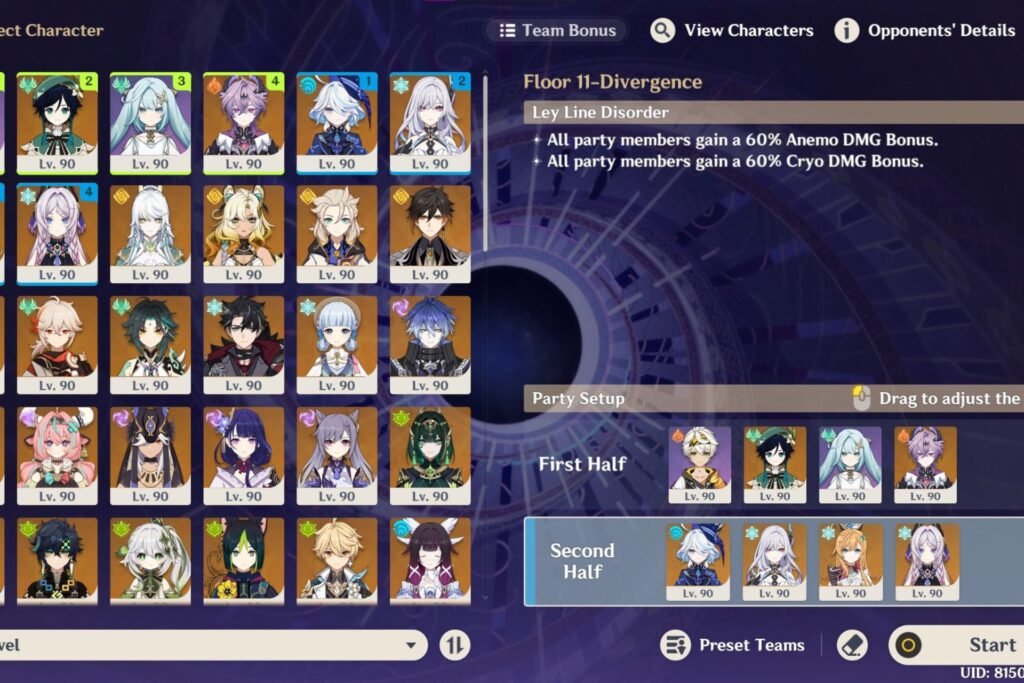
The Ley Line Disorder this cycle includes a 60% Anemo DMG Bonus in the first half, and 60% Cryo DMG Bonus in the second half. It is obvious that this is tailored towards Varka and Skirk, but there are reasonable alternatives for this floor.
Chamber 1
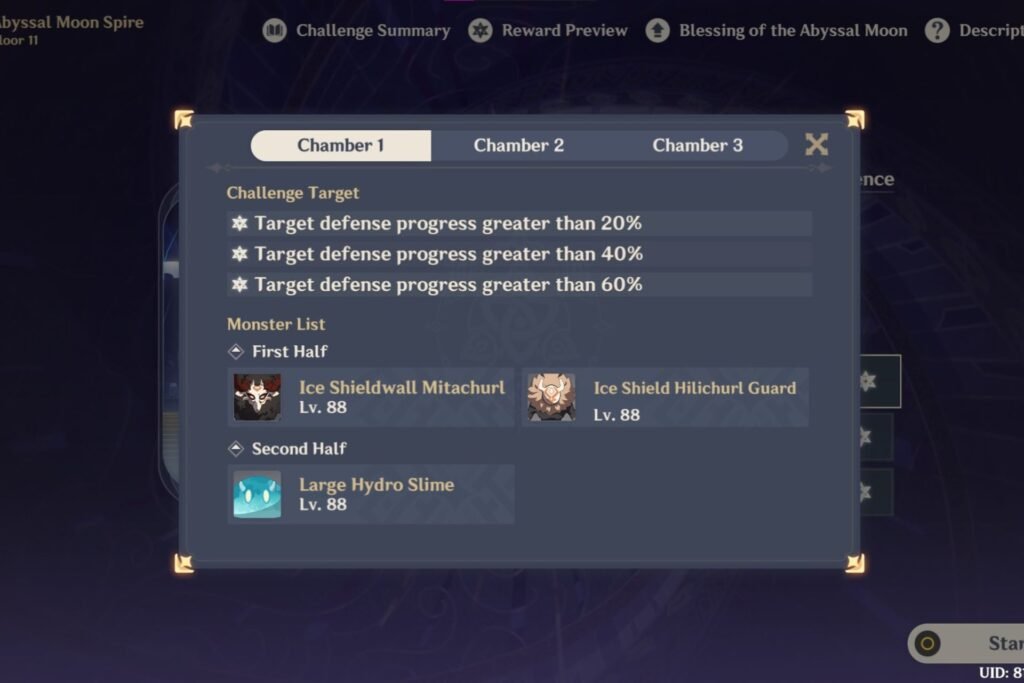
You will be defending the monolith, and to gain 3 stars, you have to ensure it doesn’t fall below 60% health across both halves.
Enemies in the first half include Ice Shield Mitachurls and Ice Shield Hilichurls. In the second half, there will be Large Hydro Slimes. Even though both halves have 24 enemies, it shouldn’t be a problem so long as you can keep the aggro on yourself.
Aside from the top Anemo and Cryo options, Pyro is actually very good in both halves, with Dendro hyperbloom also being viable in the latter one.
Grouping the enemies will help a ton, so make sure you have an Anemo grouper, even better if they have VV shred and TTDS… looking at you, Sucrose.
Chamber 2
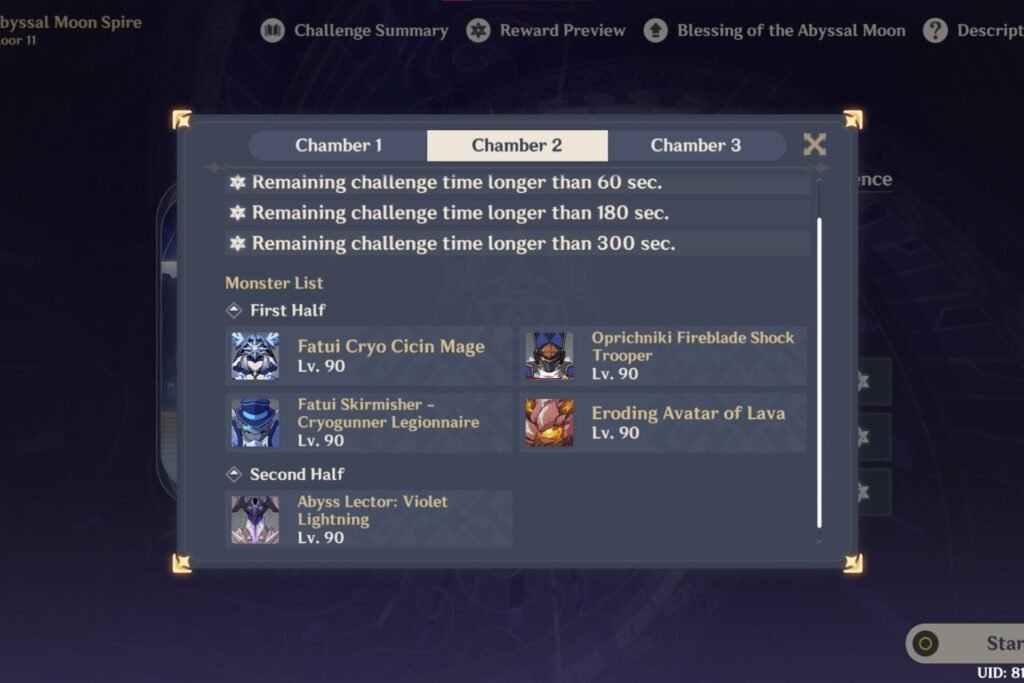
You have to defeat all enemies with at least 300 seconds left in your timer. The time carries across both halves as always.
For the first half, there will be Cryo Cicin Mages, Shock Trooper, Cryogunner, and Eroding Avatar of Lava, in that order. In the second half, there will be an Electro Abyss Lector. These can get a little annoying with the shields up.
Similar to the first chamber, Pyro works wonders in both halves. But if you only have 1 Pyro team built, you can use it in the first half and go with a Dendro option for the second. Remember, the DPS only matters when shields are not up. If they are, high application is key.
Bennet alone can be perfect if you are having trouble with Abyss Lector’s shield. You can use his Burst and cast the tap Skill fast with a very short cooldown, chipping away at its shield pretty quick.
Chamber 3

You have to defeat all enemies with at least 420 seconds left in your timer. The time carries across both halves as always.
In the first half, there will be the Geo and Cryo Lawachurls, and then Ruin Drake: Earthguard. In the second half, there is the Electro Radiant Beast. Having good DPS here will make the chamber very easy.
You can get away in the first half with just a Pyro support to take away the shield. The only problem is the Electro Radiant Beast. They chip away at your health pretty fast, and can be annoying with characters that do not want heals, such as Hu Tao and Arlecchino.
Still, it should be fairly easy to brute force even with those characters if you can dodge the attacks.
Floor 12
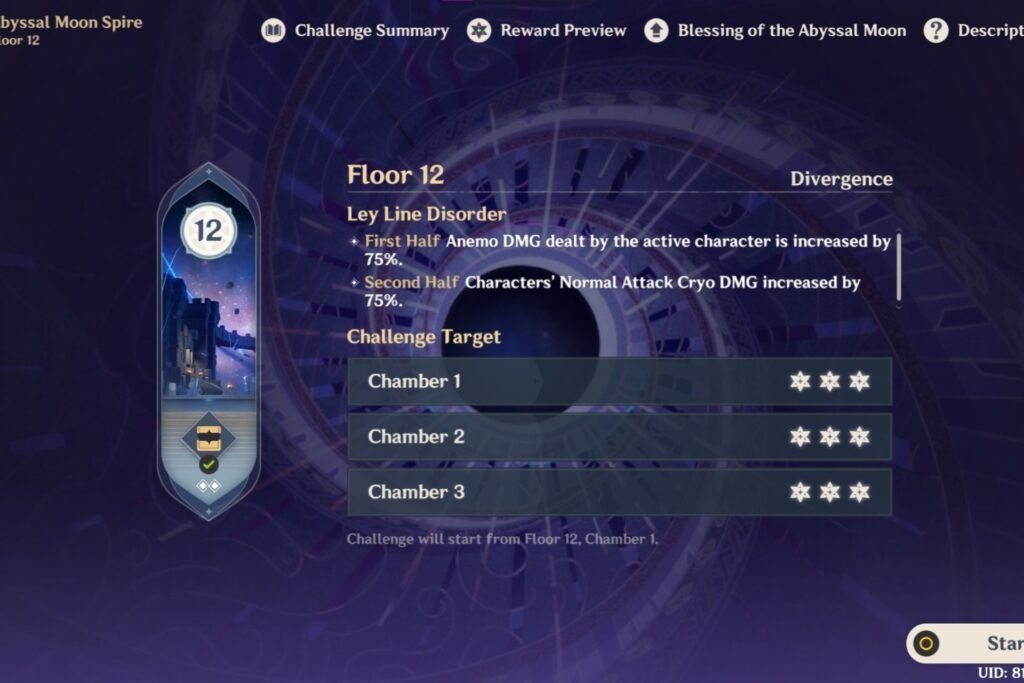
The Ley Line Disorder for Floor 12 is a bit too specific. This time, it increases Anemo DMG of the active character by 75% in the first half and Normal Attack Cryo DMG by 75% in the second half.
Again, this is tailored for Varka and Skirk, so if you have either of the two teams decently built, this will be a walk in the park.
In all these chambers, the time requirement will remain the same. You have to defeat all enemies with at least 420 seconds left in your timer.
Chamber 1
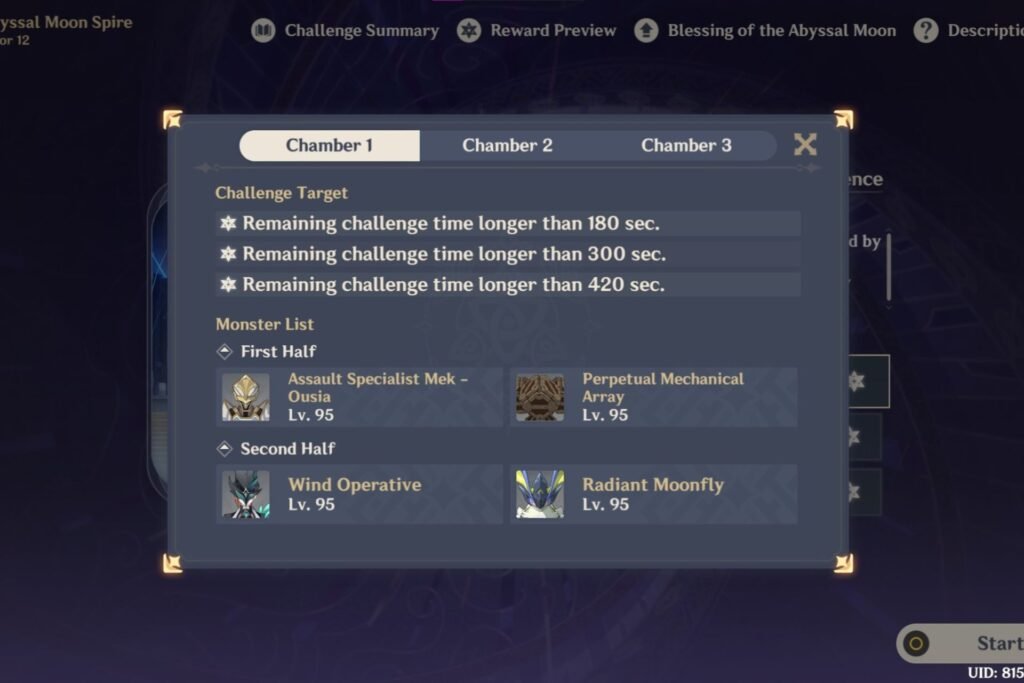
In the first half, there will be an Assault Mek and the Perpetual Mechanical Array. For the second half, there is the Fatui Wind Operative and Radiant Moonfly.
There is no hard rule for elements in the first half. If you have a well-built DPS, you can brute-force it pretty easy. The second half does limit your team’s options.
You really need a healer for the Moonfly’s coccoon attack and debuff, and a Cryo team would definitely be the best. But as long as you can keep the debuff off and remain healthy, it should be easy to defeat it with any non-Dendro or Pyro characters.
Chamber 2
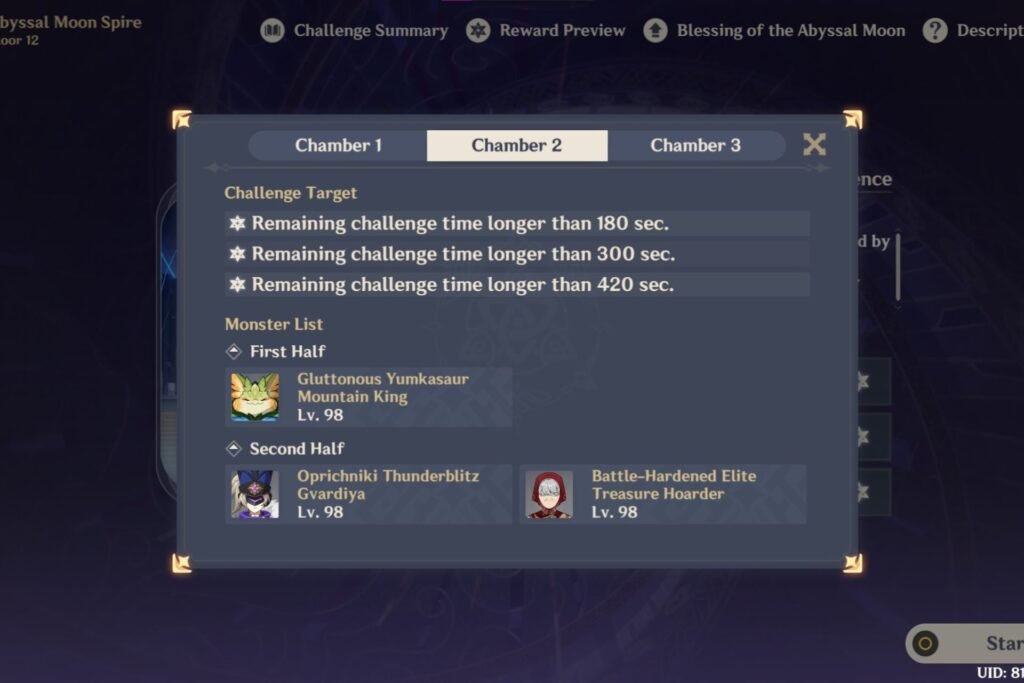
In the first half, there will be the Yumkasaur Mountain King, while the second half has a Thunderblitz Gvardiya and the Granny Local Legend.
For the first half, you can do pretty well with an overload or mono Pyro team. It is a little tanky, but any decent DPS with the right supports should make quick work of it.
Second half, again, wants you to use a freeze team. Your main DPS doesn’t necessarily need to be Cryo; it can be Hydro. Having someone like Neuvillette with Cryo supports can keep the enemy frozen so long as you keep up the Cryo application.
Chamber 3
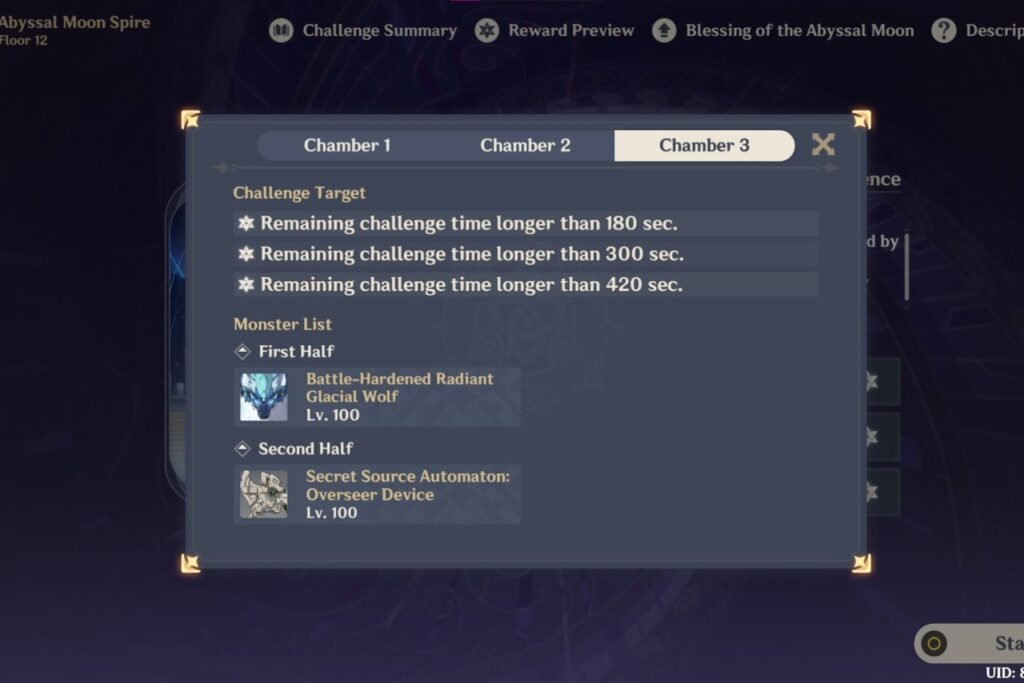
In the first half, there will be the Radiant Glacial Wolf, and for the second half, there is Secret Source Automaton: Overseer Device… yes, the same one that is in the 6.4 Stygian Onslaught.
You just want to avoid Cryo characters in the first half due to the enemy’s resistance. Pyro characters will make quick work of the Wolf by defeating the spectral wolf and stunning it.
For the second half, a freeze team is essential. Aside from premium Skirk, you can use Neuvillette with Escoffier and Layla/Citlali, but it will take some tries even if your team is well-built.
The key is to keep the Cryo application up so your main DPS can take down its health. Thankfully, it is much weaker than its Stygian counterpart, so if you were able to defeat it at Menacing, this should be pretty easy.
Some Useful Tips
- While the Abyss is tailored for Varka, Venti benefits just as much, if not more. Use him if you have him.
- Most enemies in Floor 12 can take a big chunk of your health with just a single attack. Use a shielder or good healer if you find yourself struggling.
- If you don’t have a Pyro DPS, you can also brute-force most of the chambers’ first half with Pyro supports like Xiangling and Durin.
- If you find yourself struggling to get used to enemy patterns in the second half, fight their counterparts in the game map instead of redoing the first half.
- You don’t need to beat all chambers with the same team. You can redo it, and the highest star count for each chamber will be gained separately. So you can use different teams for Floor 12 chambers 1 and 2 across multiple runs.
This Spiral Abyss is reasonable compared to others, and element restrictions aren’t harsh. You can complete the first half of both Floor 11 and 12 with a Pyro carry, and the only two chambers that have some restrictions are the final two of Floor 12.
True team restrictions would be this cycle of Imaginarium Theater. Luckily, we have also prepared a complete guide for it.