
You hop onto the Steam store, excited to download Highguard for the first time, but then you see a warning that the game requires Secure Boot and TPM 2.0 to be enabled. With some more Googling, you find out that these are BIOS settings that can be tricky to enable if you’ve never done so before.
You’re not alone, as thousands of gamers have dealt with this same issue with Highguard and similar games that require these two settings for anti-cheat. Although it may seem daunting, we’ll walk you through the steps to enable Secure Boot and TPM 2.0 so you can play Highguard on your PC.
How to check if Secure Boot is enabled
Before we begin, it’s best to find out whether you have both of these options disabled or if it’s just one, since Steam will give you that warning even if you just have one disabled. Here’s how you check to see if you have Secure Boot enabled on your PC:
- Open the Run command by pressing the ‘Windows key’ + ‘R‘.
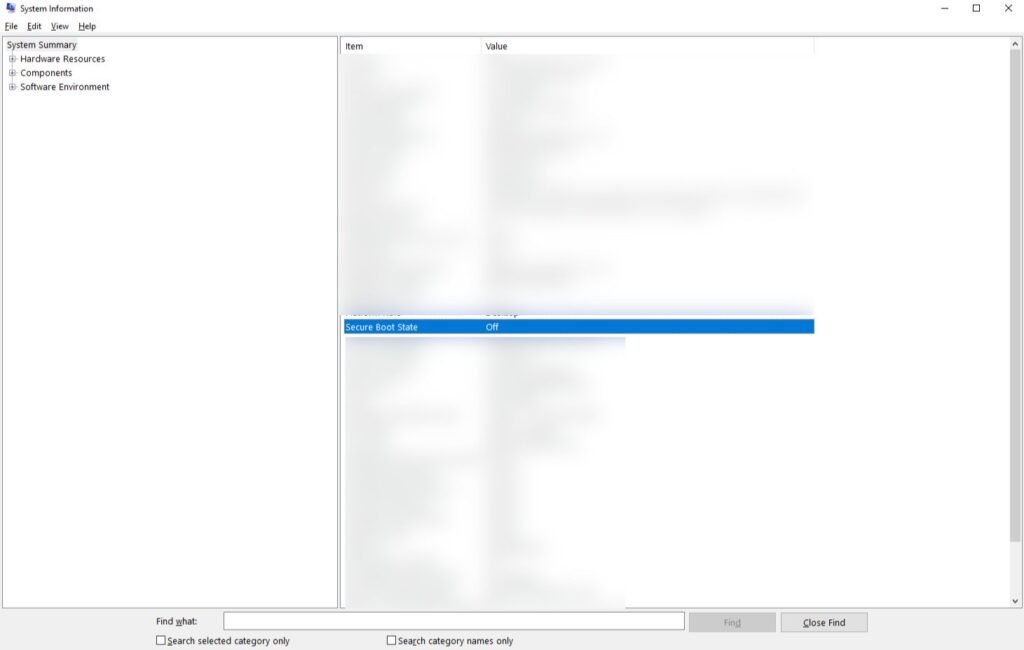
- Type ‘msinfo32‘ and press ‘Enter‘.
- Scroll down under System Summary until you see the item ‘Secure Boot State.‘
- It will either say ‘On’ or ‘Off’ under Value.
If it shows it’s on, you’re good to go, and it’s probably a TPM 2.0 issue you have instead. But if it says off, that means you will have to enter your BIOS to change it so it shows that it’s on.
How to enable Secure Boot
Depending on your motherboard, you may have a different BIOS/UEFI menu than someone else, but the majority of them have a similar setup. Follow these steps if you want to enable Secure Boot in your BIOS settings to play Highguard:
- Turn on your computer after being powered off, and either press ‘F2’ or the ‘Del’ key to enter your BIOS/UEFI menu. Press that key multiple times if it doesn’t work after hitting it once.
- Upon entering the BIOS/UEFI menu, make sure you are in Advanced Mode (if you have a GIGABYTE motherboard) or simply under Advanced settings.
- Find the Secure Boot option under your settings menus. It will be in different spots depending on your motherboard; it should be under the ‘Boot‘ tab, or something named similarly.
At this point, you should find a setting called ‘Secure Boot‘ that will likely say ‘Disabled.’ Before switching this on, you will need to disable CSM (Compatibility Support Module).
You should also be able to find ‘CSM Support‘ under the ‘Boot‘ tab or near your ‘Secure Boot‘ option. If enabled, change it to become disabled, and you should now be able to turn on Secure Boot.
If you’re still unable to enable it, you may also need to change ‘Secure Boot Mode‘ from ‘Custom‘ to ‘Standard.’
Once that’s done, you can save and exit. Make sure to check your Secure Boot State again once you’ve left the BIOS screen to make sure it worked.
How to check if TPM 2.0 is enabled
You will also need to enable TPM 2.0 to run Highguard, but let’s first check if your PC has it on:
- Open the Run command by pressing the ‘Windows key’ + ‘R‘.
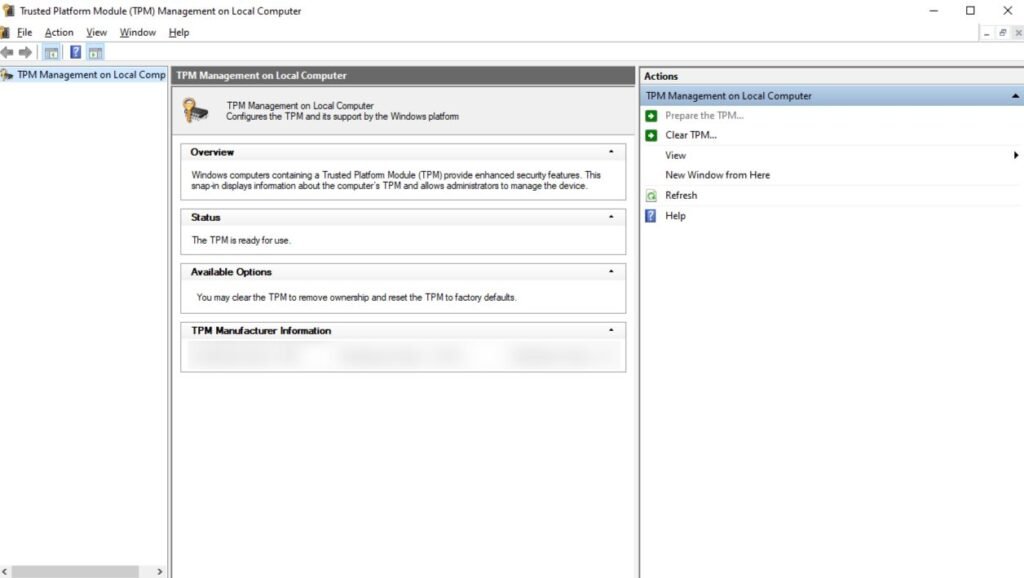
- Type ‘tpm.msc‘ and hit ‘Enter.’
- Check if your TPM is ready for use under the ‘Status’ box.
If it tells you that your TPM is not ready for use, you will have to go back into your BIOS/UEFI settings.
How to enable TPM 2.0
Follow these steps to enable TPM 2.0 on your PC to play Highguard:
- Turn on your computer after being powered off, and either press ‘F2‘ or the ‘Del‘ key to enter your BIOS/UEFI menu. Press that key multiple times if it doesn’t work after hitting it once.
- Find the ‘Settings‘ or ‘Security‘ tab, and look for the TPM option. Look for it under settings such as ‘Miscellaneous’ or ‘Trusted Computing.’
- The option to enable TPM 2.0 could be labelled differently; look for ‘Security Device Support,’ ‘TPM State,’ ‘PTT‘ (Intel), or ‘fTPM‘ (AMD). Enable whatever option it ends up being.
Save and exit, and you should now have TPM 2.0 enabled on your PC! If you’re still unable to play Highguard, contact support for your PC manufacturer, as these settings can differ depending on your PC.