
Progressing in StarRupture requires you to craft and deliver materials from the planet Arcadia-7, and some material recipes must be unlocked using blueprints. These blueprints are hidden inside abandoned bases, and the game doesn’t tell you where to find them. In this guide, you’ll find the locations of all blueprints in StarRupture.
Table of Contents
- All Blueprint Locations in StarRupture
- Rotor and Tube Blueprint
- Stator Blueprint
- Stabilizer Blueprint
- Synthetic Silicon Blueprint
- Electronics Blueprint
- Chemicals Blueprint
- Hardening Agent Blueprint
- Valve, Turbine, and Electromagnetic Coil Blueprints
All Blueprint Locations in StarRupture

There are several blueprints you’ll need to find to unlock important material recipes in StarRupture. These include:
- Rotor
- Tube
- Stator
- Stabilizer
- Synthetic Silicon
- Electronics
- Chemicals
- Hardening Agent
- Valve
- Turbine
- Electromagnetic Coil
Let’s go over the location of every blueprint in the game. It’s recommended to bring plenty of ammunition for your weapon, as Vermins frequently swarm these locations.
Rotor and Tube Blueprint
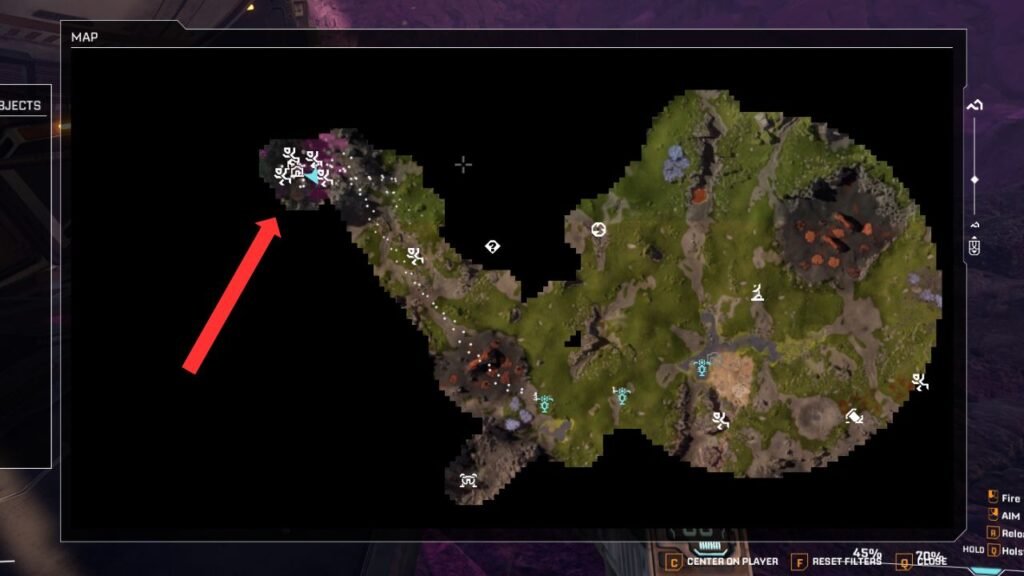
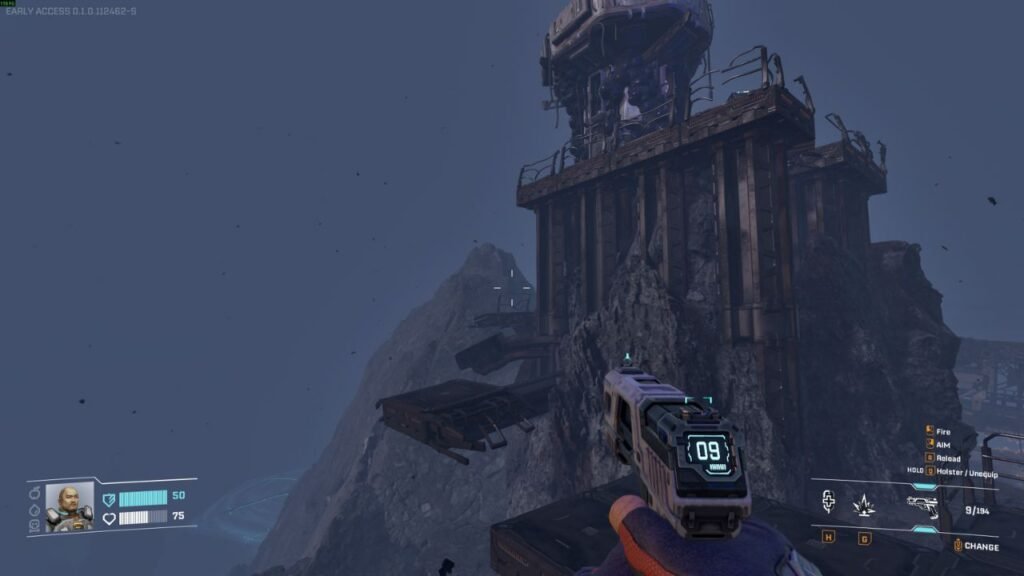
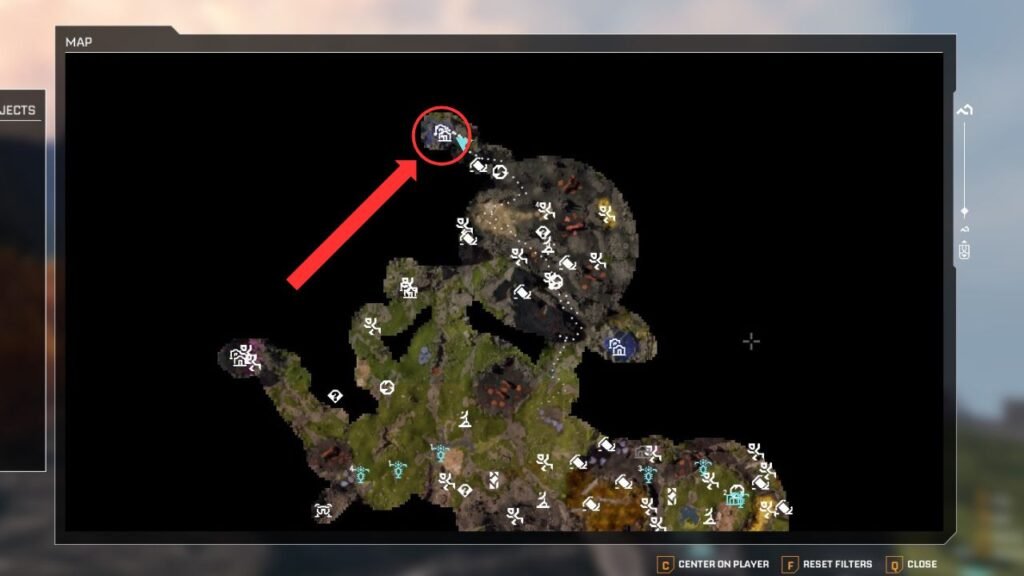
The first blueprints you’ll need to progress are Rotor and Tube, and luckily, both can be found in the same storage box. These blueprints are located at the abandoned Selenian Mining Base “Purple Haze.”
To reach this area, head northwest from the landing pod and look for a giant broken structure resembling an antenna dish, it’s hard to miss. On the map, this location is marked by a bright pink area.
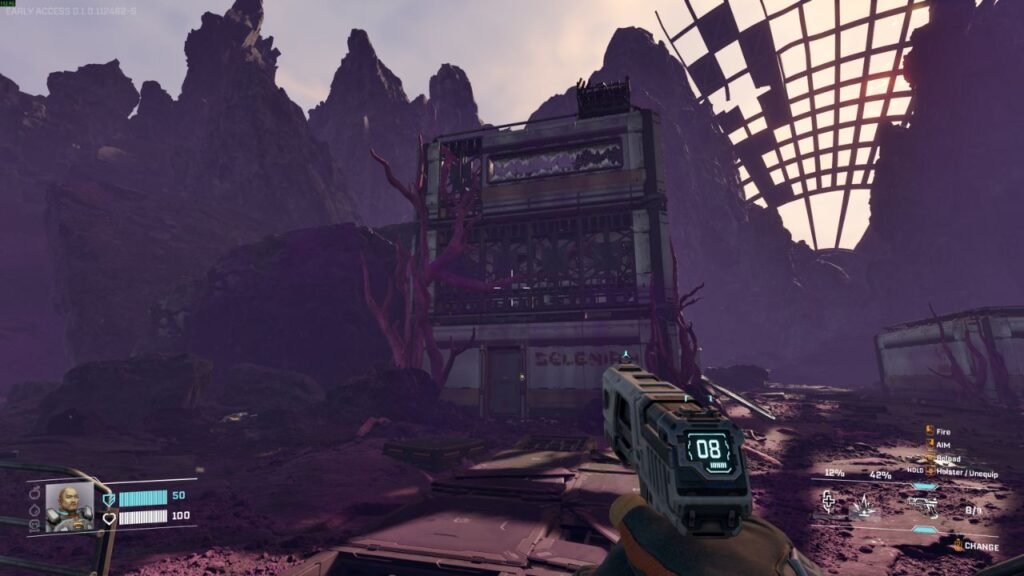
Once you arrive, head to the tallest building on the left side of the base. Enter by jumping across the rocks behind it, then make your way to the lower floor. Open the blue storage box to obtain both the Rotor and Tube blueprints.
Stator Blueprint

The next blueprint you’ll need is the Stator blueprint, which is located at the abandoned Griffith’s Research Outpost known as “Lemon Souls.” This outpost can be found north of the landing pod.
Head past the Wolfram and Calcium deposits, then look for broken buildings on top of a cliff. Climb up and enter the first building by using a nearby rock.
From there, jump across the gap to the adjacent structure. The storage box containing the Stator blueprint is on your left, tucked just behind a desk.
Stabilizer Blueprint
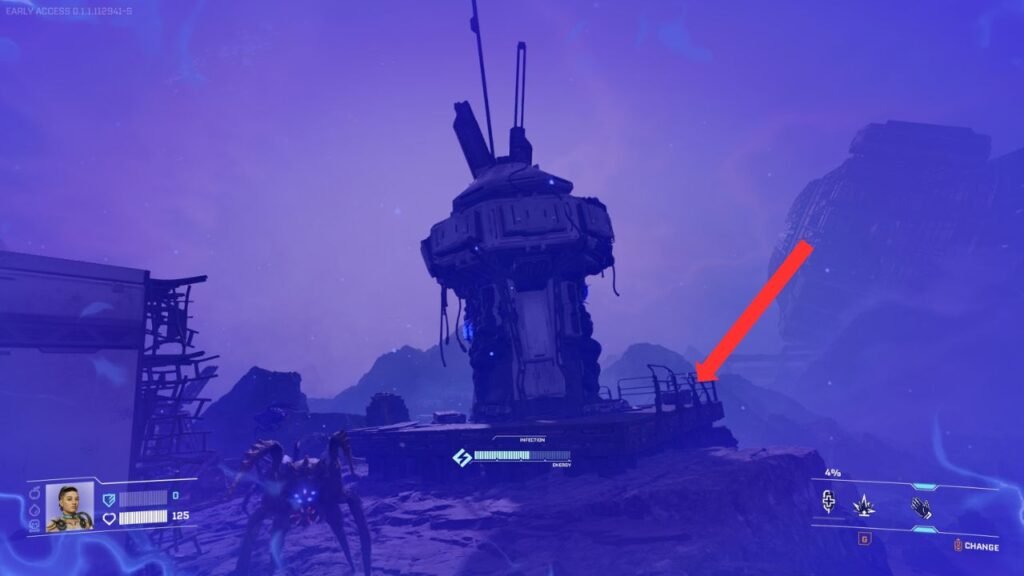
You can find the Stabilizer blueprint at the abandoned Claywood’s Research Outpost, known as “Grey Owl.” This outpost is located northeast of the landing pod, just east of the Lemon Souls outpost.
Reaching this location requires a bit of a hike, and be prepared, Vermins are everywhere in this area. Look for an outpost on the right side that’s covered in blue fumes. These fumes are harmful, so you’ll need to destroy the blue blobs on the surface to clear them.
Once the fumes are gone, continue moving upward and jump over the broken, rotating staircase. You’ll find the storage box containing the Stabilizer blueprint tucked into a corner behind a broken machine.
Synthetic Silicon Blueprint
The Synthetic Silicon blueprint can be found at the abandoned Griffith’s Research Outpost known as “Mythic Cry.” From the Grey Owl outpost, head northwest up the mountain.
This outpost is also surrounded by blue fumes, which are more difficult to clear than those at the previous location.
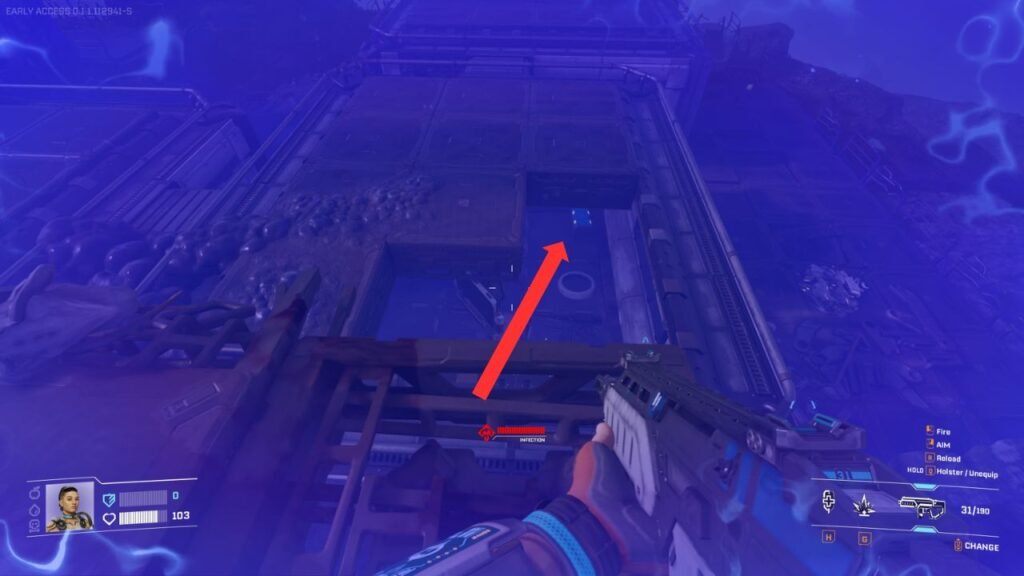
After entering the outpost area, make your way to the highest point of the ramp, where you’ll see several broken Solar Generators. From there, jump down through the broken roof of the building.
Once inside, you’ll immediately find the blue storage box containing the Synthetic Silicon blueprint.
Electronics Blueprint
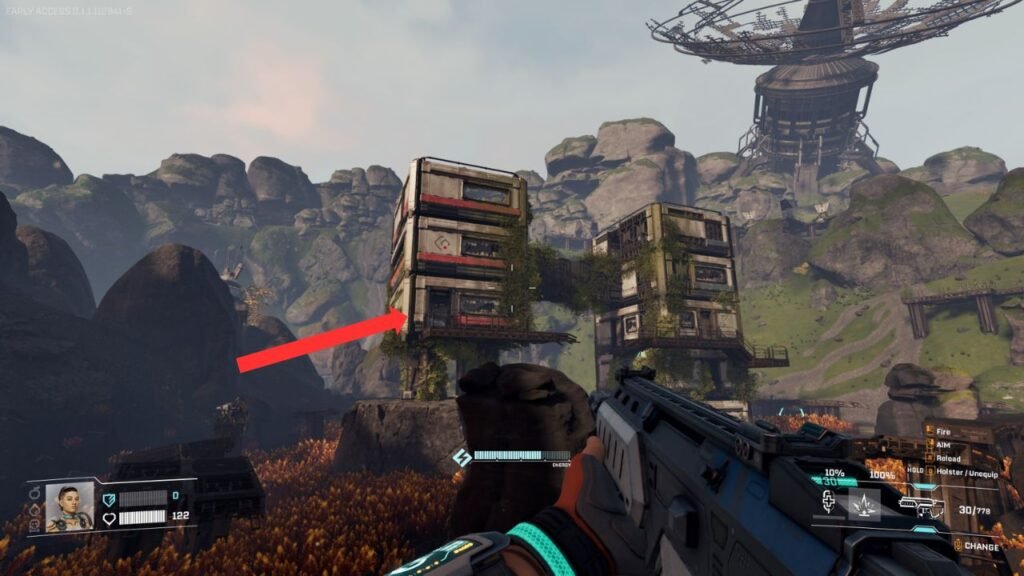
This is where things get intense. The Electronics blueprint is located at the abandoned Selenian Mining Base known as “Copperfield,” east of the starting pod. This base sits right behind a massive Sulfur deposit and is overrun with Vermins.
The building you’re looking for is the tallest three-story structure in the base. The blue storage box containing the Electronics blueprint is located on the top floor, making it hard to miss.
Getting there, however, is the real challenge due to the large Vermin colony guarding the area. You can either fight through them, which requires a large amount of ammunition, or sprint past the enemies, rush into the building, grab the blueprint, and escape quickly.
I did the latter, and I did not regret it.
Chemicals Blueprint

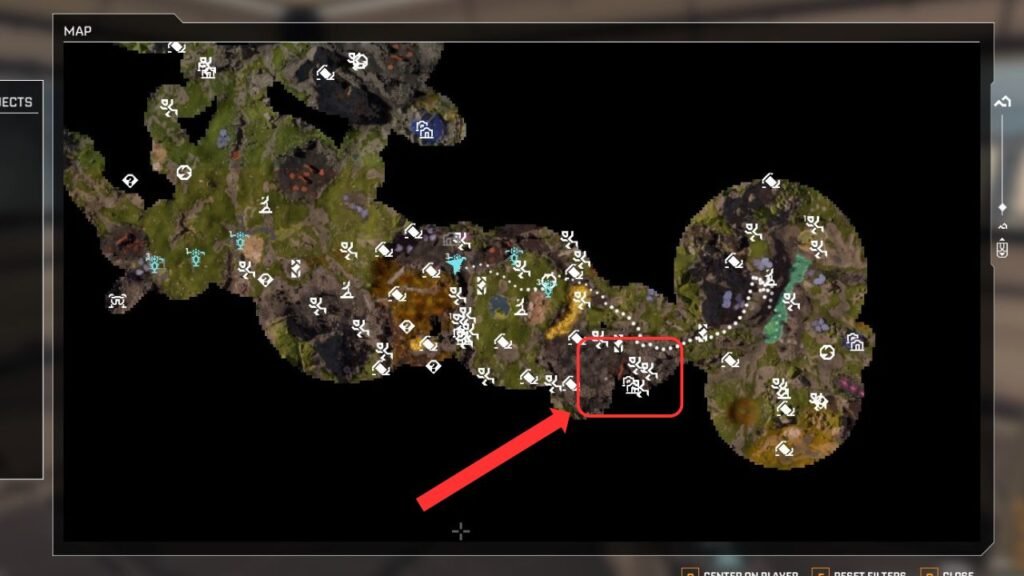
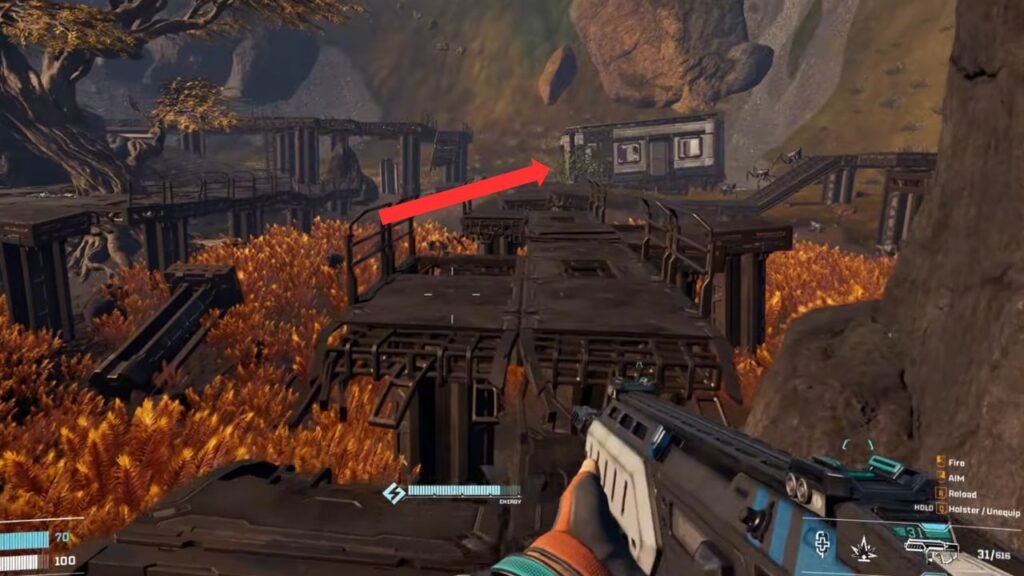
The Chemicals blueprint is located at the abandoned Clever Robotics Research Outpost known as “Spored Rock.” Like the Stabilizer blueprint location, this area is covered in blue fumes and populated by Vermins, though not as many as at Copperfield. This outpost is located east of the Copperfield base.
To avoid unnecessary combat, you can bypass Copperfield by taking the path just north of it, which helps you avoid most of the Vermins.
Once you reach the outpost, climb the broken stairs and head to the highest level of the ramps. Look for a broken radar-like machine, the storage box containing the Chemicals blueprint is hidden behind it.
Be cautious, as this area is guarded by a Goliath Vermin, so be prepared for a fight.
Hardening Agent Blueprint
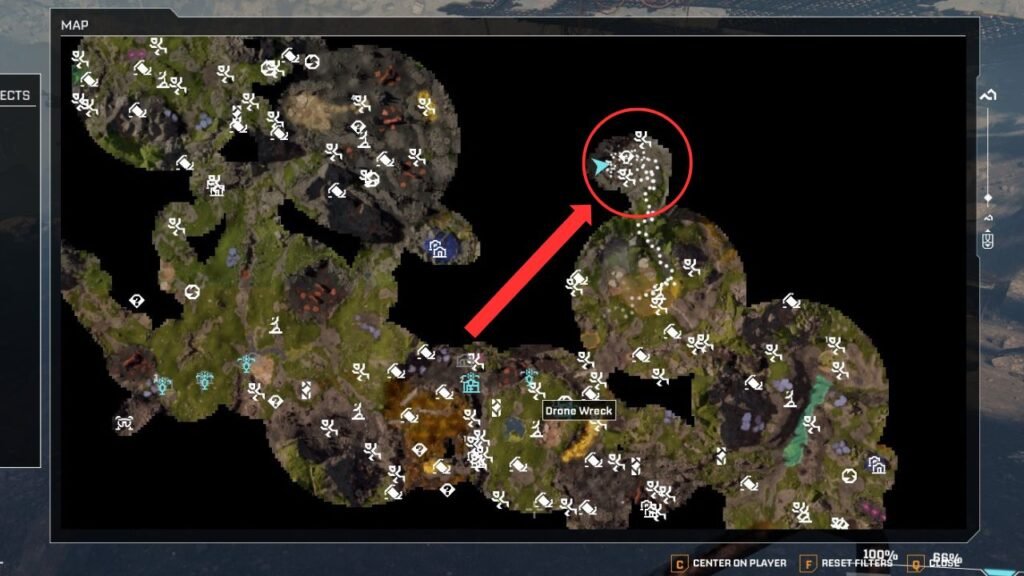
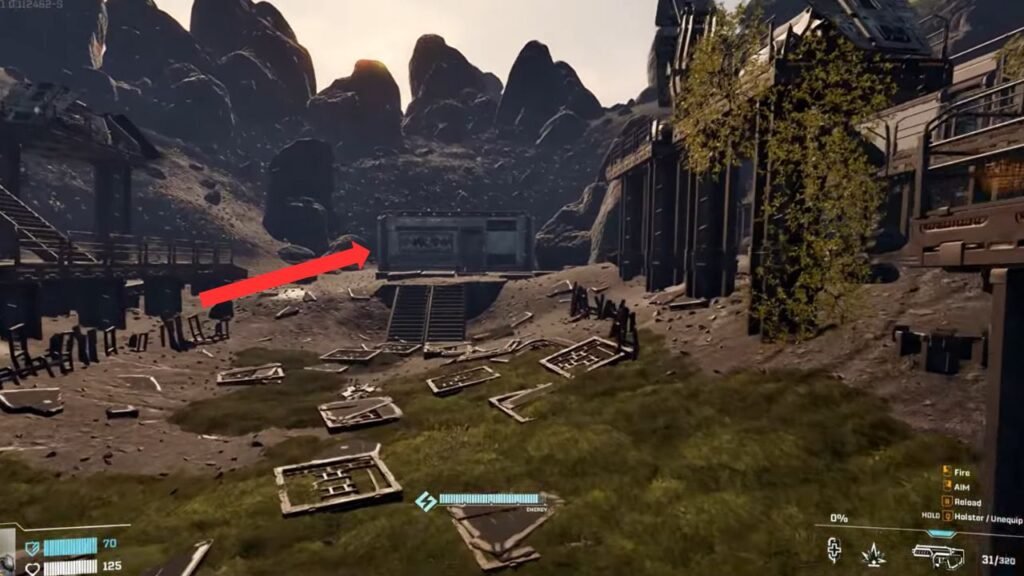
The Hardening Agent blueprint is hidden beneath the massive World Engine located at the center of the map, close to the IRO Secret Outpost “Next Step.” The easiest way to reach this area is to head north from the large Sulfur deposit near Copperfield.
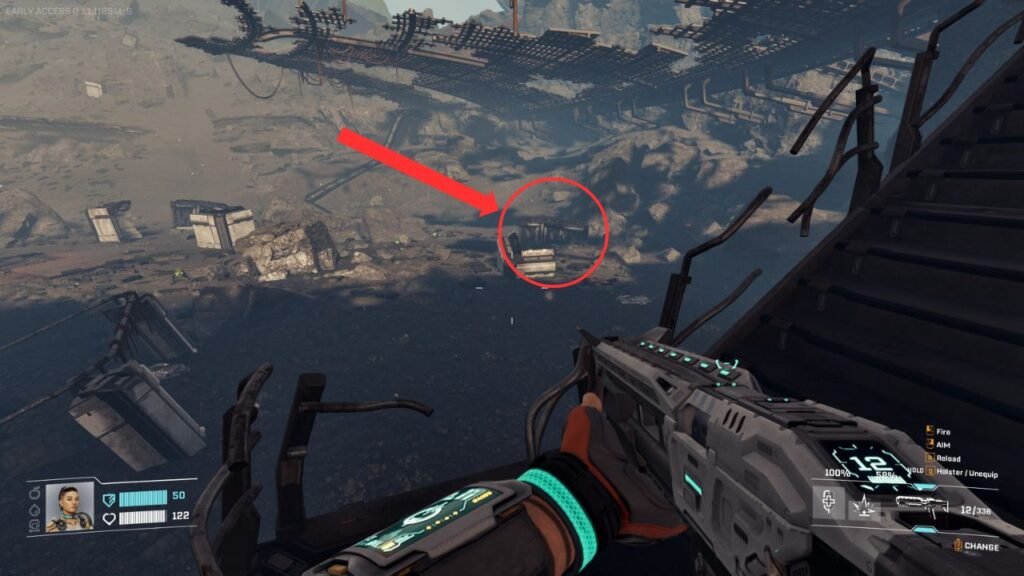
Continue toward the World Engine until you reach the crater area, then carefully make your way down using the broken stairs. Once you’re at the bottom, look for the second broken structure on the right.
Inside, you’ll find the blue storage box containing the Hardening Agent blueprint.
Be warned, this area is swarming with Vermins, so bring serious firepower. A shotgun is especially effective in this scenario.
Valve, Turbine, and Electromagnetic Coil Blueprints
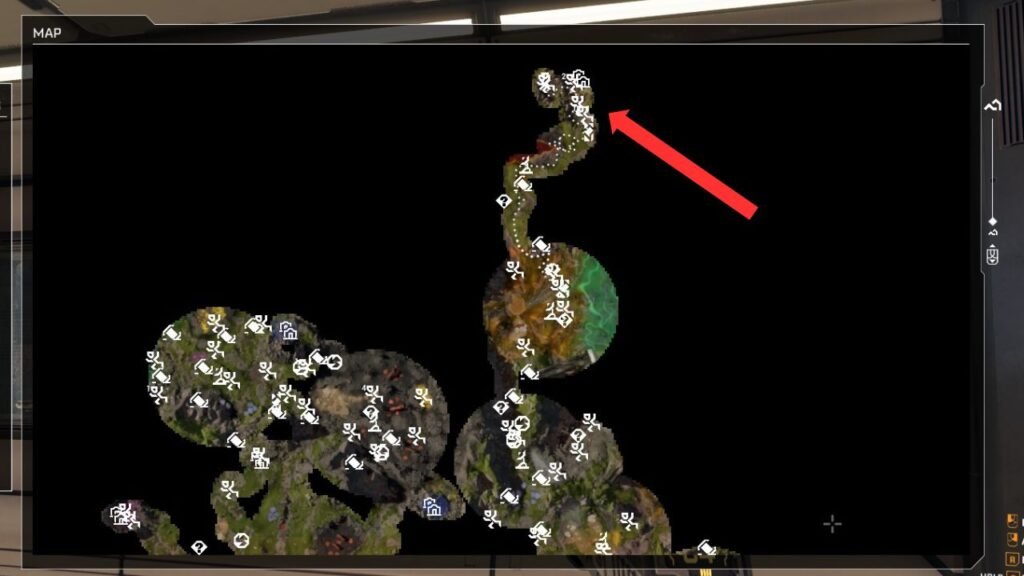
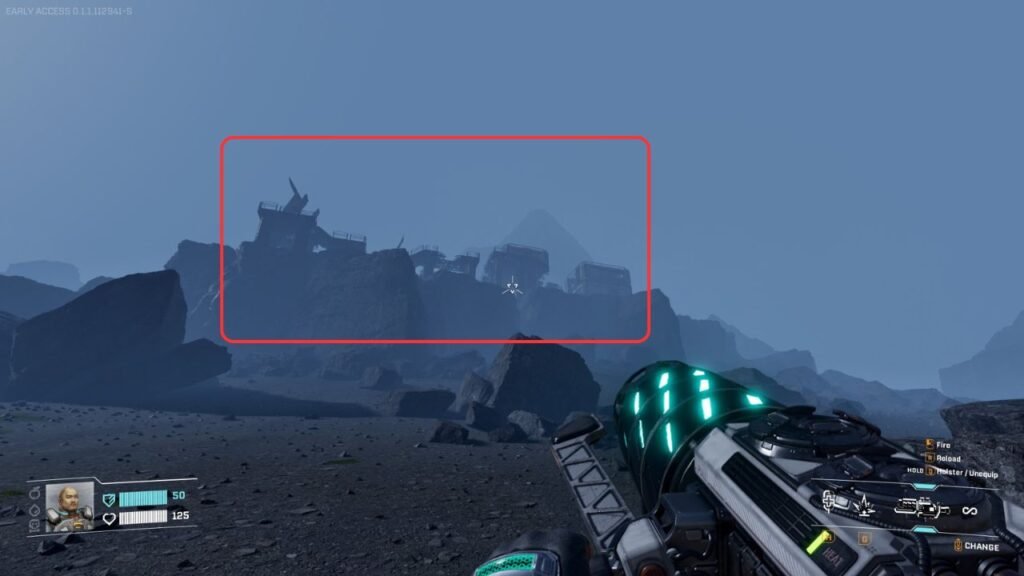
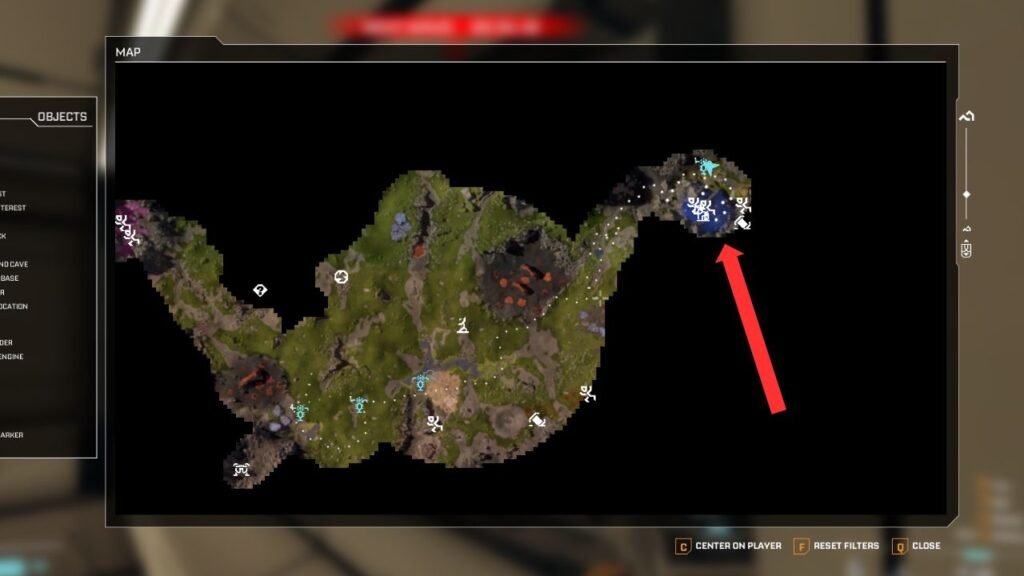
You can find the Valve, Turbine, and Electromagnetic Coil blueprints at the abandoned Clever Robotics and FHS Research Base known as “Redleaf,” located at the northernmost part of the map. From the World Engine, head north until you spot a large red pond and a gorge with a massive broken satellite dish.
Unlike the previous blueprints, obtaining these requires solving a keycard puzzle by collecting three keycards.
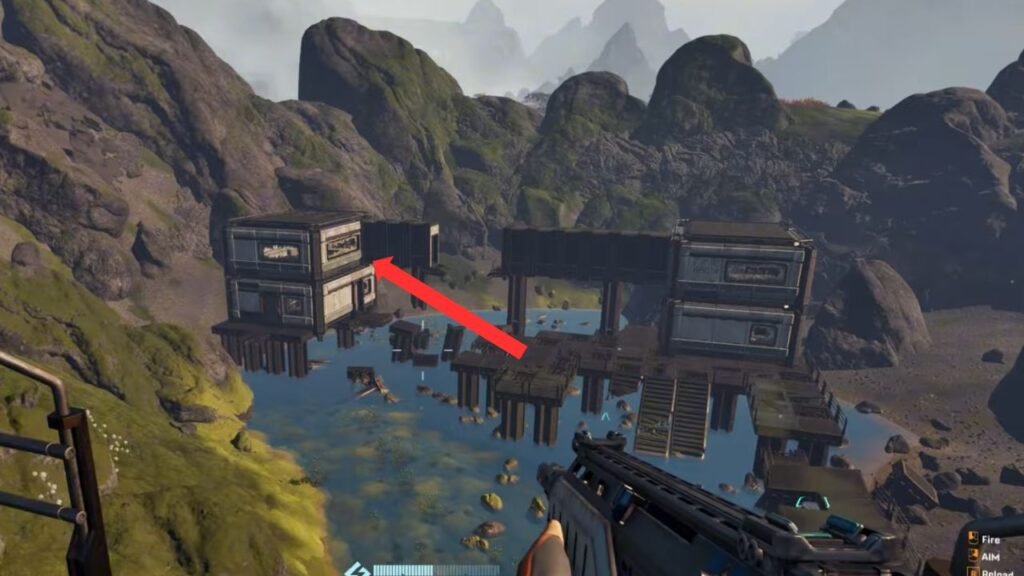
Red Keycard (Master Key)
The most important keycard to open the doors is the red master keycard. Look for a pair of twin buildings surrounded by orange plants that slow your movement. The keycard is inside the left building, you’ll need to jump across the bridge gap from the other building to get in.
First Keycard
The first keycard is located inside a small, crooked building behind some broken pathways, north of the twin buildings.
Second Keycard
The second keycard can be found in a small structure between broken Solar Generators, located west of the twin buildings.
Third Keycard
The final keycard is in the southeastern part of the base. Look for buildings over a pond with a broken bridge. The keycard is on the second floor of the left building, marked with a DNA symbol.
After collecting all the keycards, return to the twin buildings and now enter the building on the right side. Open the door, climb upstairs, and insert all three keycards.
This will unlock a pathway leading to another room containing loot, an audiocom log, and a blue storage box with the Valve, Turbine, and Electromagnetic Coil blueprints.
Finding these blueprints takes effort, and likely a few deaths (which happened to me, twice). However, they’re mandatory for progression in StarRupture. Make sure you always bring enough firepower to defend yourself.
Godspeed!